If you’ve installed an upgrade on your Printrbot, been playing around with your default settings, or the auto-leveling process isn’t working quite right for you, then you may have to adjust some EEPROM settings.
Checking Your Current Settings
The first step is to confirm what your current settings are. A factory reset may not bring you back to a usable condition if you make a mistake so it is always a good idea to know your previously set settings.
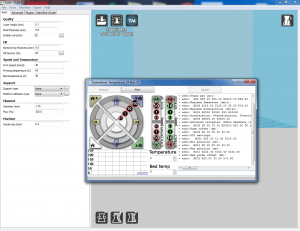
To check your current settings you will need to pull up your G-Code input screen. This can be done by opening Cura and using Pronterface UI with a plugged in printer. You will need to put a STL on the build plate and then bring up the controller. Once the controller is open you will see a text input box on the right, this is where you will input the G-Code commands.
The first line we will enter is “M501” without the quotations. This will show all your current settings, which you may want to take a picture of in case you want to revert something. Be aware that these G-Code commands can be Case-Sensitive depending on the software you are inputting them into.

Setting your Build Plate Size
To set your build plate size to default for your specific printer you will want to find the right printer at the following link: Default Build Dimensions and Sensor Offset
The following instructions will be for a Printrbot Simple Metal, but should be similar for most Printrbots.
You will find the numbers labeled as Max Position (mm) and compare them to the M211 settings for your specific printer. As seen above ours was set to “M211 X152.40 Y152.40 Z152.40″ This is very close to where it should be as it is currently set to exactly 6” in each dimension.
If your settings aren’t anywhere near where they are suggested to be, you can change your settings with a M211 command followed by a M500. The M211 enters the numbers and the M500 saves them to the printer. You will then want to enter a M501 to confirm the settings took hold.
For a Printrbot Simple Metal it would look as follows:
M211 X152.00 Y152.00 Z152.00
M500
M501
If your Printer is for example probing too far to the right when doing it’s Z-calibration you will want to ensure that you do your M211 command with a lower X value than you currently have. The values are in mm so if you want to adjust the standard Printrbot Simple metal’s z-calibration process 22mm to the left on it’s final probe location you will adjust the M211 command to read as follows: M211 X130.00 Y152.00 Z152.00 . Be sure to save the settings with a M500 command.
These instructions should allow you to get close to the right spot with the default settings and then make adjustments as needed to fine-tune your printer exactly how you need.
After changing these settings be sure to watch your printer to be sure it is moving as intended. It is easy to make a mistake such as a typo that has unintended effects.
